
Report Settings
Manage Report Settings on Loyalife
Overview of Report Settings
The Report Settings module in Loyalife allows users to configure important parameters that influence how reports are generated and managed.
These settings include defining the financial year, report generation delays, historical views for auto-deletion, and the week start preferences.
Additionally, these settings are synced with the generation period settings for Transaction, Member, and Communication custom views, ensuring consistency across all reports generated within the platform.
Access Report Settings
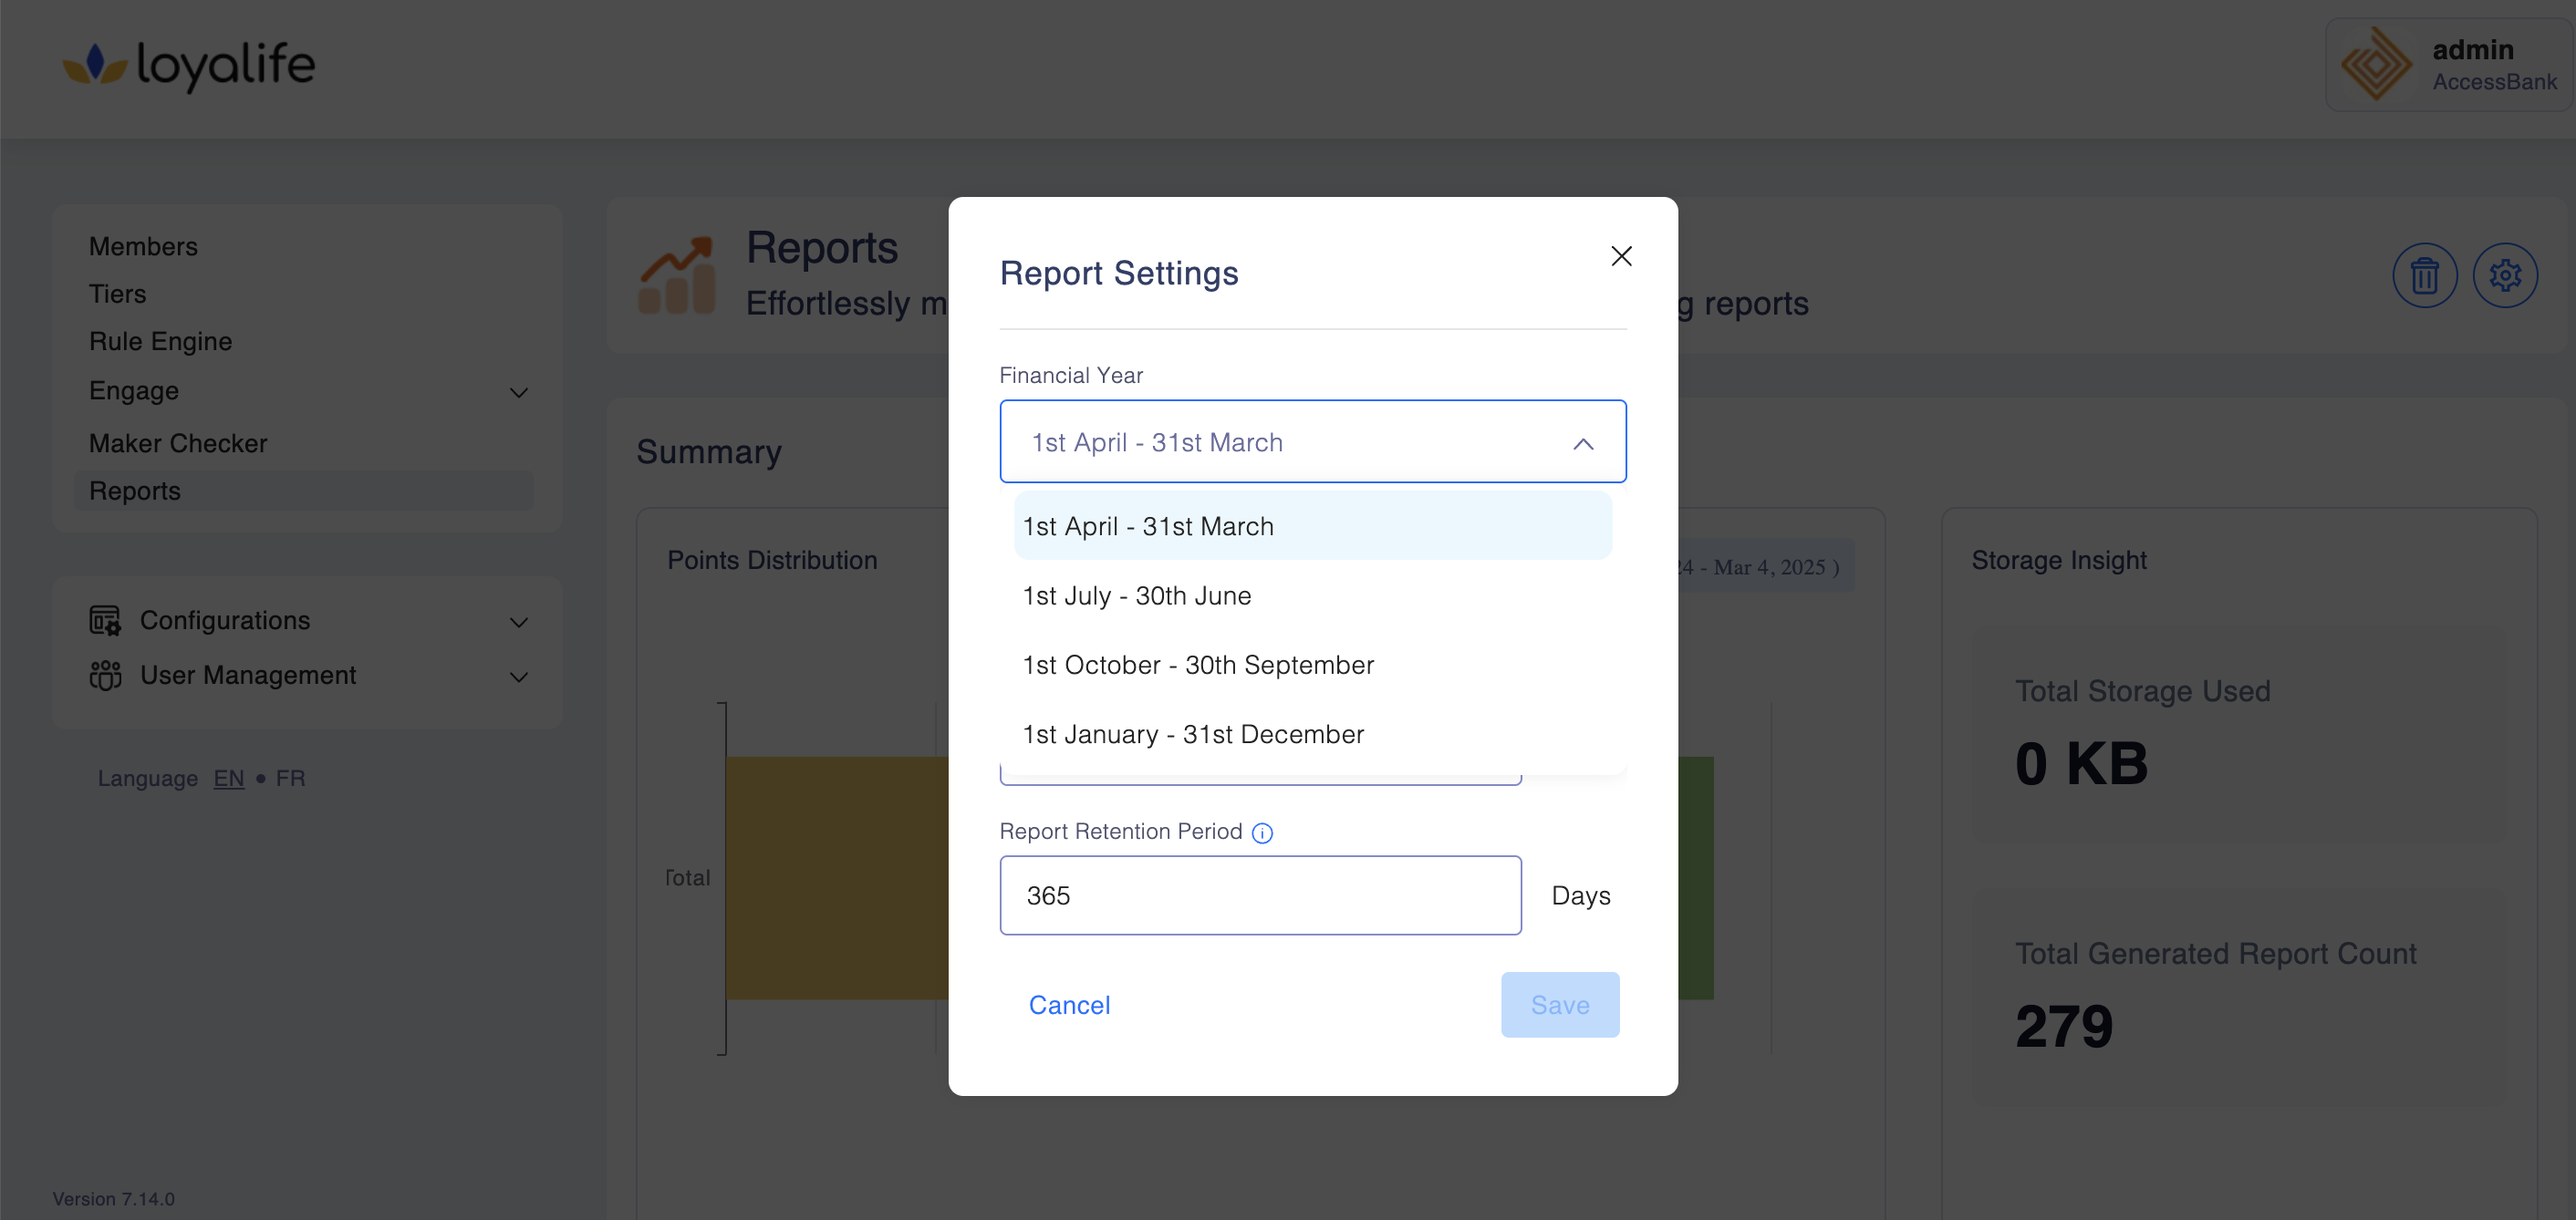
Navigate to the Reports section and click on Settings (or a similar option) to access the Report Settings window.

Key Fields in Report Settings
Financial Year
The Financial Year setting defines the start and end dates of your organization’s fiscal year. It ensures that reports generated throughout the year align with your company’s financial reporting cycles.
Example
If your organization’s fiscal year runs from 1st April to 31st March, set this in the Financial Year field to ensure all reports follow this time frame.
How to Adjust:
Use the dropdown menu to select the appropriate start and end dates for the fiscal year.
Sync with Custom View Settings
The financial year setting is automatically applied to reports for Transactions, Members, and Communications generated through custom views. This ensures that all reports adhere to the selected financial year configuration.
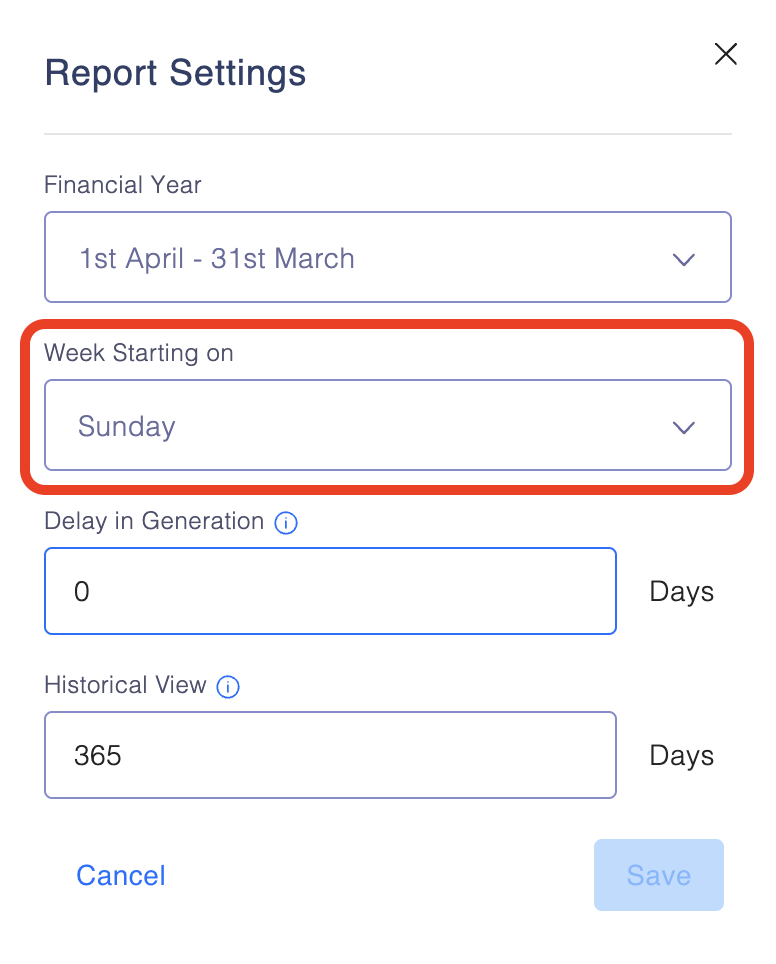
Week Starting On
This setting determines the start day of the week for weekly report generation. This is particularly useful for organizations that may start their workweek on different days, depending on their geographic region or internal scheduling preferences.
Options: Common options include Sunday, Monday, and other days of the week.
How to Adjust:
Select your preferred starting day for the week from the dropdown menu.
Sync with Custom View Settings:
The selected starting day for the week is synced with the custom views for Transaction, Member, and Communication reports. This ensures that weekly reports generated from custom views use the same start date across all modules.
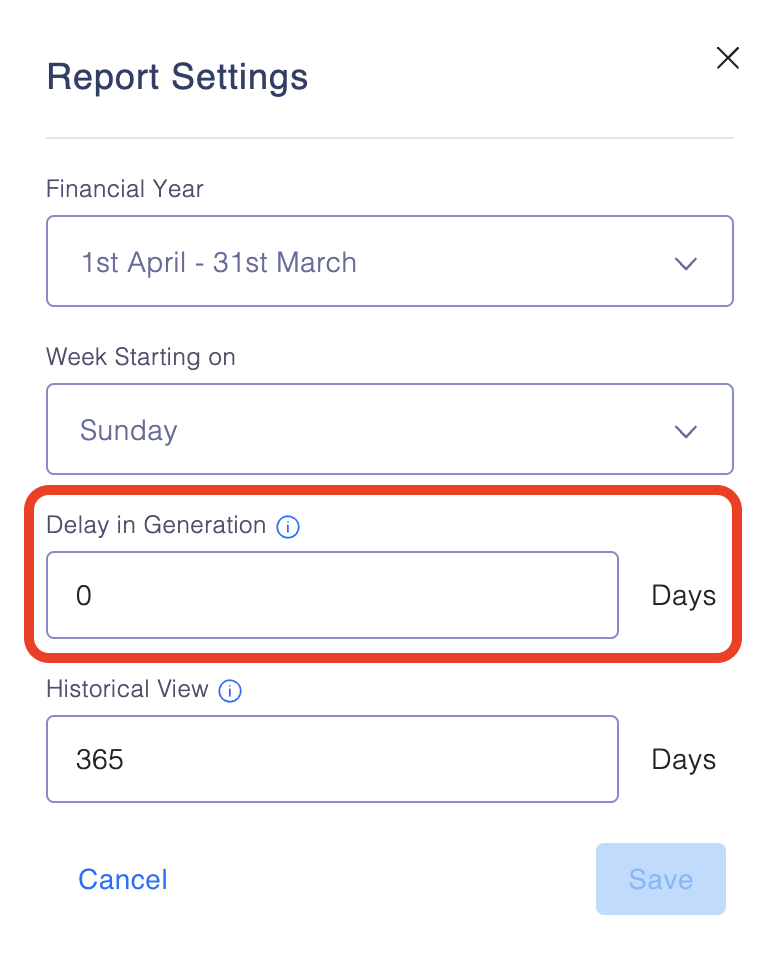
Delay in Generation
This setting allows you to introduce a delay before reports are generated. This is useful if you need time to validate or review data before reports are created and distributed.
Example
Setting a 2-day delay means reports will be generated two days after the data is available.
How to Adjust:
Input the number of days by which you want to delay report generation.
Sync with Custom View Settings
The delay in generation setting is applied to custom views for Transactions, Members, and Communication reports. This ensures a consistent delay across all report types when generating data, allowing sufficient time for data validation.
Historical View (Auto-Deletion of Reports)
The Historical View setting determines how long reports are retained before being automatically deleted from the system. This helps in cleaning up old data and preventing unnecessary storage of outdated reports.
Example
Setting it to 365 days ensures that any report older than 365 days is automatically deleted.
How to Adjust:
Input the number of days after which reports should be deleted.

Sync with Custom View Settings
This setting is also synced with the generation periods for Transaction, Member, and Communication reports. If a report exceeds the set historical view period, it will be automatically deleted, keeping the system clean and manageable.
How to Configure Report Settings
-
Access Report Settings
-
Adjust the Desired Fields
- Modify the Financial Year, Week Starting On, Delay in Generation, and Historical View fields to match your organization’s reporting requirements.
-
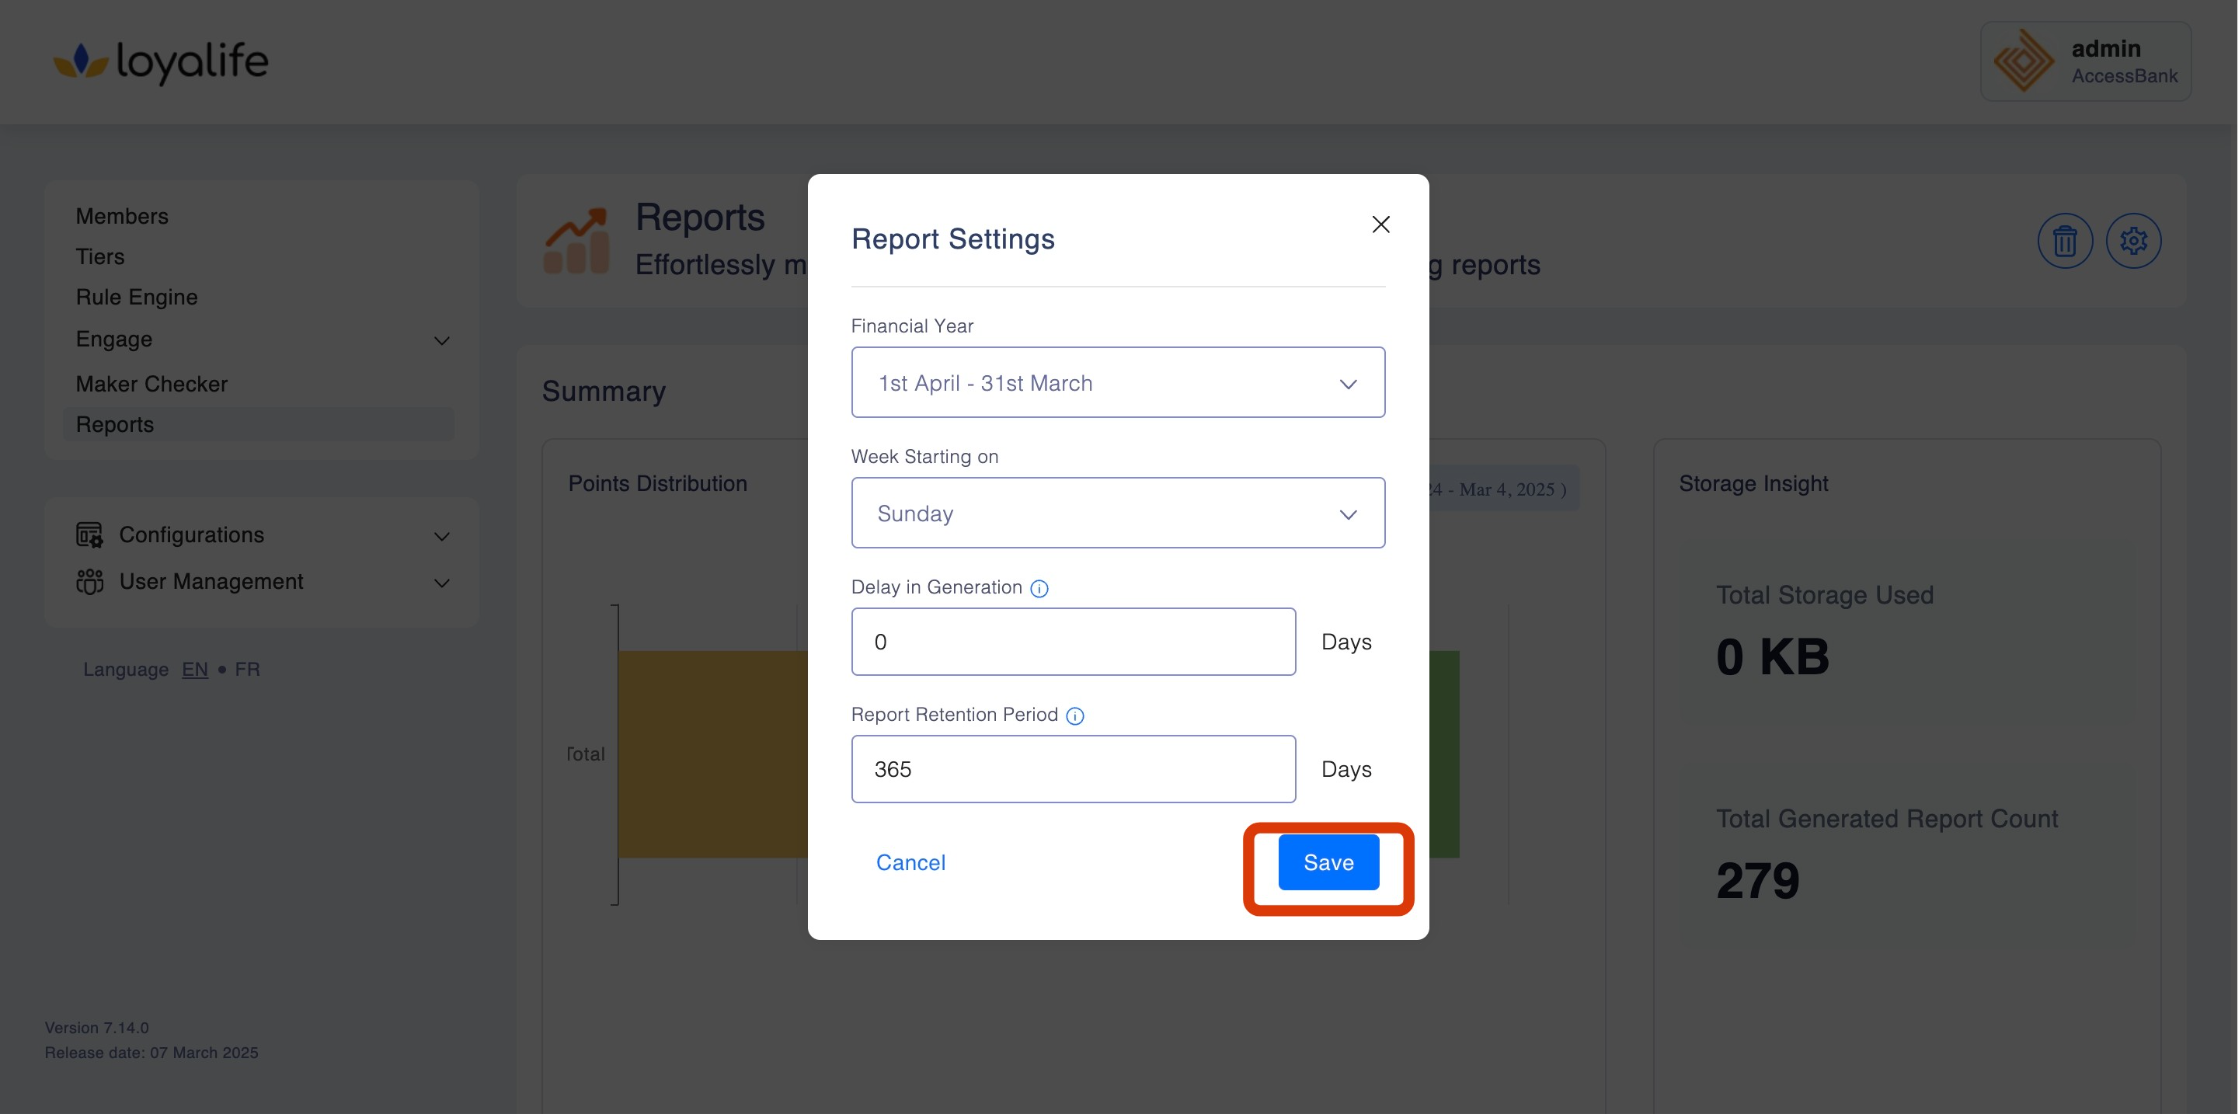
Saving Your Changes
- After making adjustments, click Save to apply the changes. These settings will now be reflected in reports generated across the platform, including custom views for transactions, members, and communication.
Updated 16 days ago